=
You know that feeling of low-grade anxiety when you suspect something is wrong behind the scenes? That’s the nightmare of the invisible leak. It’s the kind of problem that quietly breeds mold behind your drywall while you’re sleeping, turning a cozy home into a structural and financial headache.
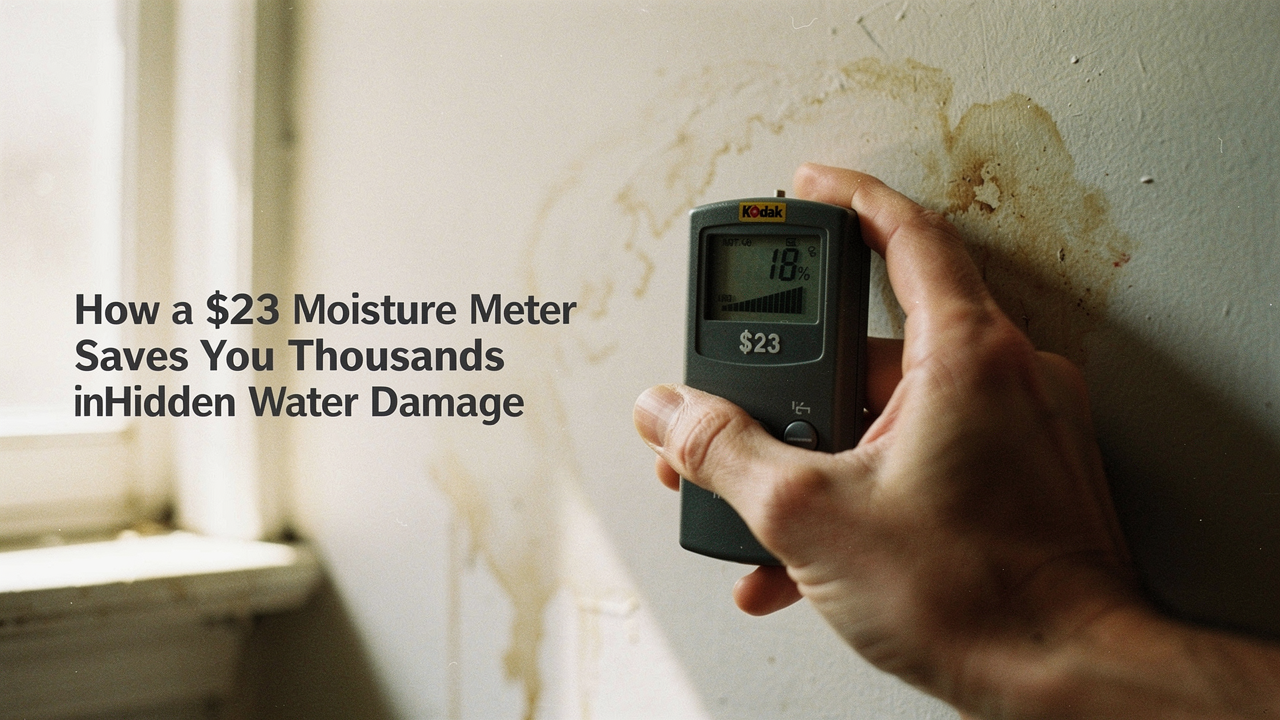
I didn’t call a plumber immediately. Instead, I grabbed a tool I now believe every intentional homeowner should own: a simple, $23 moisture meter. In less than thirty seconds, I confirmed that the wall was at 28% moisture—well into the danger zone. I caught a pinhole leak in my water heater line before it could rot the subfloor.
Today, I want to show you how this one tiny investment can act as your home’s financial shield, saving you an average of $3,900 in repair costs [1] and giving you the peace of mind that your space is actually as healthy as it looks.
The $3,900 Problem: Why Hidden Water is a Financial Assassin
Here’s the thing about water damage: it’s a master of escalation. What starts as a “Class 1” intrusion—maybe a little dampness in the corner of a room—can quickly spiral into a “Class 4” disaster involving structural framing and specialty drying [2].
According to 2026 data from Modernize, the average homeowner spends between $1,300 and $6,500 on water damage restoration [1]. But those numbers only tell half the story. If that moisture is left to sit for more than a couple of days, you aren’t just paying to fix a leak; you’re paying for mold remediation, which Michaelis Corp notes can easily add another $2,000 to $6,000 to your bill [3].
I’ve seen it happen to friends where a slow window leak went unnoticed for a season. By the time the drywall started to crumble, the bill hit $10,000 because the structural studs had begun to rot. That is a devastating blow to any “good life” budget. The goal of using a moisture meter isn’t just to find leaks; it’s to catch them while they are still a $150 plumbing fix rather than a $15,000 structural overhaul.
Meet Your New Best Friend: The Affordable Moisture Meter
I’ll admit it—I used to think moisture meters were only for grizzled home inspectors or professional contractors. I assumed they were too technical or too expensive for my weekend home-maintenance routine. But after researching the “High Lifestyle ROI” of these devices, I realized that the entry-level models are incredibly user-friendly.
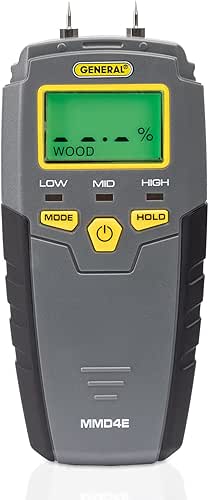
There are two main types you’ll see: pin-type and pinless. Pinless meters are great for scanning large areas without leaving marks, but they can be pricey. For most of us, a pin-type meter is the perfect starting point. You simply push two small metal probes into the material (like drywall or wood), and it measures the electrical resistance to tell you exactly how much water is inside.
Let me be honest: I ignored this tool for years until I realized I was essentially flying blind in my own home. I was guessing about the health of my walls based on whether or not I could see a stain. That’s a risky game to play.
I spent weeks looking for a device that was accurate enough to trust but simple enough that I wouldn’t need a manual every time I used it. I wanted something that felt like a natural extension of my Sunday “reset” rituals—something I could pull out to check the area around the dishwasher or the guest bathroom without a fuss.
What I found was that you don’t need a $500 professional unit to protect your investment. The sweet spot for a homeowner is a reliable, calibrated digital meter that gives clear, instant readings. It’s about having a “good enough” baseline so you know when to call in the pros.
Micro-Verdict: This is the single most effective way to “see” through your walls and stop a financial disaster before it starts.
The 10-Minute “Home Health Scan” Protocol
Creating an intentional space means more than just choosing the right linen sheets; it’s about ensuring the “bones” of your home are supporting you. I recommend doing a quick “Home Health Scan” once a month or after any major Austin rainstorm.
Step 1: Establishing Your Dry Baseline
Before you go hunting for leaks, you need to know what “normal” looks like. Take your meter to a wall on the interior of your house that you know is dry—maybe a hallway far from any plumbing. Test it there. This gives you a “dry baseline” [4]. If your dry wall reads 8%, and the wall under your kitchen sink reads 18%, you know you have a potential issue, even if the paint looks perfect.
Step 2: The Grid Scan Technique
Don’t just poke one spot. If you suspect a leak—say, under a window—use a grid pattern. Test every six inches along the baseboard and up the sides of the window frame. Water follows gravity and capillary action, so it often travels further than you’d think.
To make this easier, here is a quick reference for what those numbers actually mean for your home’s most common materials:
- Drywall: Below 12% is ideal. If you see anything over 20%, that material is saturated and needs immediate attention [2].
- Wood Flooring: 6% to 12% is the standard range depending on your local humidity.
- Brick/Masonry: Usually reads lower; look for “relative” spikes rather than absolute percentages.
Where to Scan (The “Hotspot” Checklist)
You work too hard to let a leaky pipe ruin your weekend. Focus your 10-minute scan on these high-risk areas:
- The Kitchen: Under the sink, behind the refrigerator (check that ice maker line!), and around the dishwasher.
- The Bathroom: The base of the toilet, the wall shared with the shower, and the floor outside the tub.
- Utility Spaces: Around the water heater and the floor near your washing machine.
- Windows: Especially any windows that face the direction of prevailing storms.
The 48-Hour Clock: Stopping Mold Before It Starts
Here is the stressful truth: mold doesn’t wait. The EPA and CDC both warn that mold growth can begin within 24 to 48 hours of a material becoming saturated [5].
This is why speed is your greatest asset. If you find a damp spot with your meter on a Saturday morning, you have a window of opportunity to dry it out with fans and dehumidifiers before it becomes a health hazard. Once mold takes hold, you aren’t just dealing with a “wet wall”—you’re dealing with a biological issue that requires specialized (and expensive) cleaning.
Optimization Tip: I like to pair my moisture meter with a simple hygrometer to keep an eye on the air itself. The EPA recommends keeping indoor relative humidity below 60% (ideally between 30% and 50%) to prevent mold from settling in [5].
I’ll be the first to admit that I’m a bit of a nerd when it comes to my environment. I keep a small sensor in my laundry room. I used to think I was being “extra,” but when it alerted me that the humidity had spiked to 75% because of a venting issue, it saved me from a potential mildew breakout on my favorite linens.
Micro-Verdict: This small digital display is your first line of defense against the high-humidity conditions that mold loves.

ROI Analysis: The $23 Investment vs. The $5,000 Bill
Let’s look at the “High Lifestyle ROI” math. Most insurance companies recommend budgeting 1% to 4% of your home’s value every year for maintenance [6]. On a $400,000 home, that’s $4,000 to $16,000.
Spending $23 on a moisture meter represents about 0.5% of that minimum budget, yet it can prevent a loss that exceeds the maximum budget.
There’s also a hidden benefit: liability reduction. If you ever have to file an insurance claim, showing that you have a log of moisture readings or that you caught the leak early demonstrates that you were a proactive, responsible homeowner. In some cases, this can be the difference between a claim being accepted or denied due to “neglect” or “long-term seepage.”
Beyond the Meter: Creating a Layered Defense
If you’re like me and you want your home to work for you so you can focus on the things that matter—like hiking the Greenbelt or finally mastering that sourdough—you might want to consider a layered defense.
A moisture meter is a “manual” tool; you have to pick it up and use it. To truly optimize your home, I recommend a “Persona Loadout” based on your level of commitment to home maintenance:
The Minimalist (Essential Setup)
You want maximum protection with minimum clutter.
- Essential: A reliable pin-type moisture meter for monthly checks.
- Essential: A basic hygrometer to monitor living room humidity.
The Proactive Landlord (The “Peace of Mind” Setup)
You have more than one property to watch, or you travel often.
- Essential: A dual-mode (pin/pinless) moisture meter for faster inspections.
- Pro Upgrade: Smart water leak sensors placed under every sink and near the water heater.
- Pro Upgrade: A smart hygrometer that sends alerts to your phone if humidity spikes.
The High-ROI Power User
You want your home to be a self-monitoring fortress.
- Essential: A high-end moisture meter with data-logging capabilities.
- Pro Upgrade: A whole-home smart water shut-off valve (like the Moen Flo) that detects micro-leaks in the pipes automatically.
Final Thoughts: The Detective Mindset
At the end of the day, living well isn’t just about the aesthetic of your home; it’s about the integrity of it. A moisture meter isn’t just a gadget; it’s a financial shield. It allows you to move from a state of “hoping everything is okay” to “knowing everything is okay.”
Spend the $23 today. Do your first 10-minute scan this weekend. I promise, the peace of mind you’ll feel knowing there are no “financial assassins” hiding behind your baseboards is worth every penny. Let’s protect our spaces so they can keep supporting our best lives.
Affiliate Disclosure: Links in this article may earn a commission, which helps support “Best Goods for Good Life.” I only recommend products I have researched or used in my own home optimization journey. This guide is for informational purposes and is not a substitute for professional structural engineering or IICRC-certified restoration services.
References & Authoritative Sources
- Modernize (2026). Water Damage Restoration Cost Guide. [https://modernize.com/restoration/water-damage/cost]
- Angi (2025). How Much Does Water Damage Repair Cost? [https://www.angi.com/articles/how-much-does-it-cost-repair-water-damage.htm]
- Michaelis Corporation (2024). The Hidden Expenses of DIY Restoration. [https://www.michaeliscorp.com/blog/how-diy-water-damage-repair-can-cost-you-more-in-the-long-run]
- IICRC (2021). S500 Standard for Professional Water Damage Restoration.
- US EPA (2023). Mold Course Chapter 3: Using Moisture Meters and Other Tools. [https://www.epa.gov/mold/mold-course-chapter-3]
- State Farm (2025). How to Budget and Save for Home Maintenance. [https://www.statefarm.com/simple-insights/residence/how-to-budget-and-save-for-home-maintenance]