=
It’s heartbreaking, right? But here’s the thing: your Keurig isn’t necessarily dying. It’s likely just crying out for a bit of TLC.
In my decade of optimizing home spaces, I’ve realized that people often confuse “cleaning” with “descaling.” Think of cleaning as the daily hygiene—like brushing your teeth—while descaling is the deep-down maintenance, like a professional dental cleaning for your machine’s internal “arteries.” When you neglect these, you’re not just risking bad coffee; you’re cutting the life of your machine short [1].
Treating your brewer with a little intentionality—the same way I baby my sourdough starter—ensures a High Lifestyle ROI. You get better-tasting coffee and a machine that lasts years instead of months.
The Keurig Maintenance Schedule: Daily, Weekly, and Every 3 Months
Most of us wait until that nagging “Descale” light flashes before we take action. But by then, the mineral buildup is already affecting the heating element and the pump. If you want your machine to run like it did on day one, you need a rhythm.
According to research from appliance experts, a proactive schedule is the secret to coffee maker longevity [3]. Here is how I break down my routine:
The Daily & Weekly Checklist
You don’t need a full afternoon to keep things fresh. These small habits prevent the “ick” factor—specifically the biofilm and mold that love to grow in damp, dark reservoirs.
- Daily: Rinse the reservoir and refill with fresh, filtered water. Wipe down the external housing with a damp cloth to remove splashes.
- Weekly: Wash the drip tray and the K-Cup pod holder in warm, soapy water. Most of these parts are top-rack dishwasher safe, but I prefer hand-washing to prevent the plastic from getting brittle over time.
- Weekly: Give the “exit needle” area a quick wipe to prevent old coffee oils from becoming rancid.
The 3-Month Deep Dive: Filters and Scale
Every three to six months—depending on how hard your local water is—you need to handle the internal minerals. Keurig machines actually track the volume of water passed through the system to trigger that descale alert [1]. Even if the light isn’t on yet, I mark my calendar for a quarterly “Reset Day.”
If you live in a place like Austin where the water can be quite “crunchy” (full of minerals), you might find yourself needing this every two months. Using a water filter handle inside the reservoir can buy you more time, but it doesn’t replace the need for a deep clean.
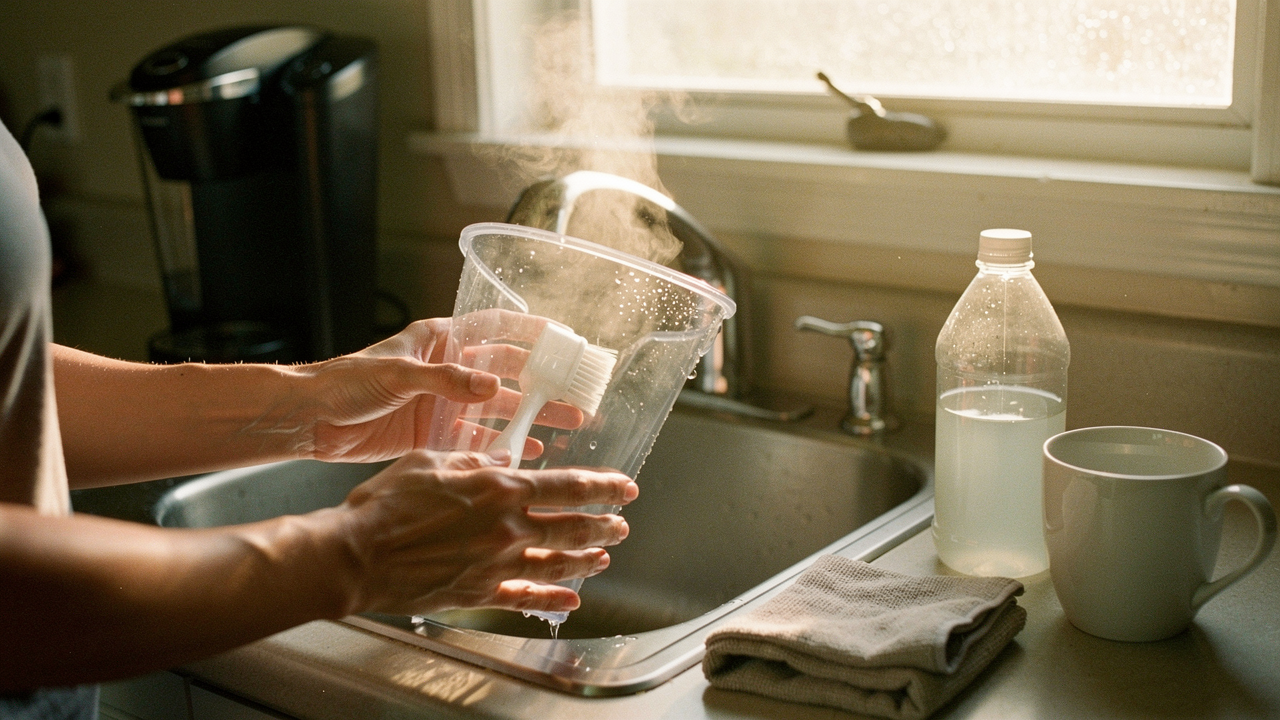
How to Clean Your Keurig: A Step-by-Step Guide
Before we get into the heavy-duty descaling, we need to ensure the “visible” parts of the machine are spotless. This prevents debris from being sucked back into the internal lines during the flushing process.
- Safety First: Always unplug your machine before you start poking around the needles.
- Disassemble: Remove the water reservoir, the lid, the drip tray, and the K-Cup pod holder assembly.
- The Soap Suds Session: Wash all these parts in warm, soapy water. If you notice any white, crusty spots on the reservoir, that’s limescale. A quick soak in a vinegar-water solution will melt it right off.
- Clean the “Face”: Use a damp, lint-free cloth to wipe the area around the pod holder. Coffee grounds love to hide in the gaskets here.
- Reassemble: Once everything is dry, put it back together, but leave the reservoir empty for the next stage: descaling.
Descaling 101: Vinegar vs. Keurig Descaling Solution
This is the big debate in the coffee world. Do you buy the branded bottle, or do you reach for the white vinegar in your pantry? To understand the choice, we have to look at the chemistry. Limescale is essentially calcium carbonate. To dissolve it, you need an acid.
What surprised me during my research was that while vinegar (acetic acid) works, specialized descaling solutions often use a blend of citric or phosphoric acids. Data suggests these branded solutions can be significantly more effective, sometimes removing up to 40% more scale than vinegar alone [2].
Method 1: The Official Descaling Solution (Recommended)
I’ll admit it—I was skeptical at first about paying for a “special” liquid when I had vinegar in the cabinet. But after a particularly bad clog in my K-Elite, I decided to see if the official stuff lived up to the hype. I noticed the machine ran quieter and the “foaming” that usually happens with vinegar was almost non-existent. It’s a smoother, more refined process that feels safer for the internal pumps.
Micro-Verdict: The ultimate reset button for your brewer’s internal health.

Method 2: The White Vinegar Hack (Budget-Friendly)
If you’re in a pinch or prefer a more “pantry-stable” DIY approach, white distilled vinegar is your best friend.
- The Ratio: Fill the reservoir halfway with white vinegar and the rest of the way with water.
- The Soak: Run the brew cycle without a pod until the reservoir is empty. Let the machine sit, powered on, for at least 30 minutes. This gives the acid time to eat through the minerals.
- The Rinse: This is the most important part. You need to run at least 4 to 6 full reservoirs of fresh water through the machine to ensure you don’t have “salad dressing coffee” the next morning [5].
Jordan’s Note: Never use apple cider vinegar or flavored vinegars. The sugars and residues will gum up the internals and leave a smell that never truly goes away.
Troubleshooting: Fixing a Clogged or Non-Brewing Keurig
You know that feeling when you’re desperate for caffeine and the machine just… stops? It makes a straining noise, but nothing comes out. Usually, this means the tiny needles that pierce the K-Cup are clogged with old grounds or scale.
Clearing the Needles
Keurig actually recommends a “paperclip hack” for this. There is a top needle (that pokes the top of the pod) and an exit needle (at the bottom of the pod holder).
- Unplug the machine.
- Straighten a paperclip and gently insert it into the three holes around the top needle to clear any compacted grounds.
- Do the same for the bottom exit needle.
- Run a “cleansing brew” with just water to flush out the loosened debris [1].
The ‘Descale’ Light Won’t Turn Off?
Here’s a frustrating reality: sometimes you finish the whole descaling process and that little light stays on. On many newer models like the K-Supreme, the machine doesn’t actually “sense” the scale; it just waits for a specific button sequence to be completed.
The Pro-Tip: Try holding down the 8oz and 12oz buttons simultaneously for three seconds while the machine is in descale mode. This usually resets the internal counter and turns the light off [4].
The Maintenance Persona Loadout
Depending on how much you use your machine, your needs might change. Here’s how I recommend “kitting out” based on your lifestyle:
The Daily Commuter (Heavy Use)
You brew 3+ cups a day and need things to work perfectly every single morning.
- Essential: A 3-month supply of Keurig Water Filter Cartridges to reduce scale before it starts.
- Essential: Keurig Rinse Pods (use weekly to clear coffee oils between descales).
- Pro Upgrade: A dedicated Keurig 3-Month Care Kit to automate the whole process.
The Minimalist (Occasional Use)
You only brew on weekends or for guests.
- Essential: White distilled vinegar (kept in the pantry for bi-annual deep cleans).
- Essential: A simple microfiber cloth for dusting the exterior.
- Pro Upgrade: A single bottle of Keurig Descaling Solution for a once-a-year “Spring Refresh.”
Spending 15 minutes every few months on maintenance isn’t just about cleaning a kitchen appliance. It’s about protecting that morning ritual that sets the tone for your whole day. When your environment—and your coffee—is clear and optimized, everything else flows just a little bit better.
Treat your Keurig like the investment it is, and it’ll keep fueling your Austin mornings for years to come.
Disclosure: While I advocate for DIY solutions when they work, please note that using non-branded descaling agents can sometimes impact warranty claims on newer Keurig models. Always check your specific manual if your machine is still under its first year of coverage.
References & Authoritative Sources
- Keurig Support. (2025). How to Descale your Keurig Coffee Maker. Keurig official support documentation. https://www.keurig.com/hub/support/how-to-descale-your-keurig-coffee-maker
- Urnex Brands. (2024). The Chemistry of Coffee Equipment Cleaning. Technical Report on mineral removal.
- Consumer Reports. (2024). How to Make Your Coffee Maker Last Longer. Appliance Longevity Guide.
- iFixit. (2023). Keurig Troubleshooting: Descale Light and Pump Priming. Community Repair Manual. https://www.ifixit.com/Answers/View/72976/My+Keurig+makes+brewing+noises+but+doesn’t+brew
- Food52. (2024). The Best Way to Clean a Keurig (With or Without Vinegar). Kitchen maintenance editorial. https://food52.com/story/24368-how-to-clean-a-keurig