
That night was the beginning of my obsession with what I call “High Lifestyle ROI.” In the world of home optimization, we often get distracted by the pretty things—the $200 linen throws or the designer candles. But true comfort? That’s a symphony of building science and sensory design. When your home is actually working with you, your stress levels drop, your sleep deepens, and your daily flow feels effortless.
Living well isn’t about having more; it’s about choosing better. Today, I want to walk you through the four pillars of home comfort—Thermal, Air, Sensory, and Budget—so you can transform your space into a high-performance sanctuary without the guesswork.
The Home Comfort Audit: Is Your House Working Against You?
Before we start buying “cozy” accessories, we have to diagnose the invisible problems. An uncomfortable home often has “symptoms” we’ve learned to ignore. Maybe you have that one guest room that’s always five degrees colder than the rest of the house, or perhaps you wake up every morning with a scratchy throat and a “stuffy” feeling.
To get a baseline, we look to the experts. The American Society of Heating, Refrigerating and Air-Conditioning Engineers (ASHRAE) suggests that for most people, the sweet spot for thermal comfort is around 68°F (20°C) in the winter and between 72–78°F (22–26°C) in the summer [3]. If your thermostat says you’re in that range but you’re still reaching for a sweater, you have a performance gap.
You can run a simple “Tissue Test” to find the culprits. Take a single ply of toilet paper or a thin tissue and hold it near window frames, electrical outlets, and baseboards on a windy day. If it flutters, you’ve found an uninvited guest: a draft. Similarly, the EPA recommends keeping your indoor humidity between 30% and 50% [4]. Anything higher invites mold; anything lower makes the air feel “thin” and cold, regardless of the temperature.
Symptoms vs. Root Causes
Here’s the thing about home comfort: the problem you feel isn’t always where the leak is. This is due to something building scientists call the “Stack Effect” [1].
Imagine your house is a chimney. In the winter, warm air naturally rises. If you have gaps in your attic or around your recessed lighting, that expensive warm air escapes out the top of your house. This creates a vacuum that sucks cold air in through the bottom—usually through your crawlspace, basement, or those drafty baseboards I felt in my kitchen. You might think you have “bad windows,” but the root cause is often a lack of attic insulation and air sealing.
Pillar 1: Thermal Mastery (Defeating the Cold Drafty House)
If you want the highest ROI on your comfort, you have to master your home’s thermal envelope. According to the U.S. Department of Energy (DOE), proper air sealing and insulation can save you an average of 15% on heating and cooling costs while making your indoor temperature significantly more stable [5].
The Energy Saving Trust notes that a typical uninsulated home loses roughly 25% of its heat through the roof and about a third through the walls [2]. When you fix these leaks, you aren’t just saving money; you’re removing the “radiant cold” that makes you feel chilly even when the air temperature is technically warm.
The Quick Wins: Weatherstripping and Caulking
I spent years ignoring the slight whistle coming from my front door every time the wind picked up. I tried piling up rugs and even using one of those old-fashioned “draft snakes,” but they were just Band-Aids. Eventually, I took a Saturday morning to actually look at the seals. I realized the original weatherstripping had compressed into a useless, thin strip of foam. After a quick trip to the hardware store for some high-quality silicone bulb seals and a tube of clear caulk for the window trim, the change was instant. The house felt “quieter,” and that biting draft was gone.
Micro-Verdict: The most affordable way to stop “bleeding” heat and instantly stabilize your room temperature.
The Deep Fix: Insulation and Air Sealing
Once you’ve handled the obvious gaps around doors, it’s time to look up. Most older homes—and even some newer ones—are notoriously under-insulated. I discovered this when I went into my own attic and saw the joists peeking through the fiberglass like ribs. By adding blown-in cellulose insulation and sealing the “top plates” (where the walls meet the attic), you effectively put a warm hat on your house. It stops the Stack Effect in its tracks.
Pillar 2: Breathing Better (Tackling Poor Indoor Air Quality)
We spend about 90% of our time indoors, yet the EPA warns that indoor air can be two to five times more polluted than outdoor air [4]. “Stuffy” air isn’t just a comfort issue; it’s a health issue. High levels of CO2 can cause brain fog, while dust and VOCs (volatile organic compounds) from furniture can trigger allergies and headaches.
Source Control and Filtration
I used to think that “freshening” the air meant lighting a scented candle or spraying something floral. I was wrong. Those often just add more VOCs to the mix. Real air comfort comes from filtration. Daikin’s research shows that true HEPA filters remove 99.97% of particles as small as 0.3 microns [9]. And while we all love our “jungle” aesthetics, research has shown that indoor plants only remove about 0.9–9% of pollutants in real-world conditions [9]. They’re great for the soul, but they aren’t a replacement for a good filter.
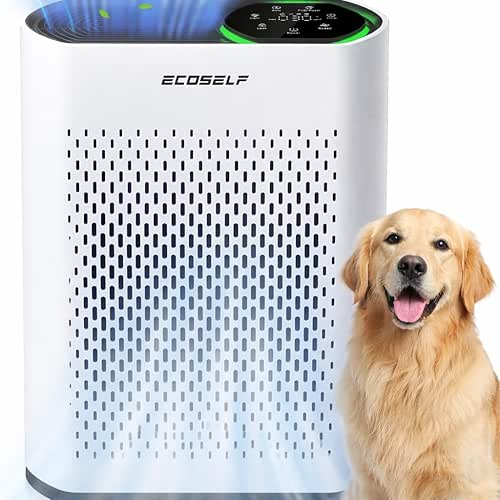
I struggled with seasonal allergies for years, especially during “cedar fever” season here in Austin. I’d wake up congested and tired, no matter how much I slept. After researching the best ways to actually scrub the air, I invested in a dedicated HEPA purifier for the bedroom. Within three days, the “heavy” feeling in the air was gone, and I stopped waking up with that nagging sinus pressure.
Micro-Verdict: A non-negotiable for deep sleep and reducing the “invisible” stress of poor air quality.

Humidity Control: The 50% Rule
The “feel” of a room is dictated heavily by moisture. In the winter, heaters dry out the air, leading to static shocks and dry skin. In the summer, high humidity makes 75 degrees feel like a swamp. Maintaining that 30-50% range is the “secret sauce” of a comfortable home.
Pillar 3: The Science of Coziness (Sensory Design)
Now that the “bones” of your comfort are set, we get to the fun part: the sensory experience. This is where we move from “house” to “sanctuary.” Coziness isn’t just a vibe; it’s an emotional state triggered by our environment.
Lighting Layers: From Harsh to Healing
The biggest mistake I see in home design is “The Big Light”—that single, harsh overhead fixture that makes every room look like a sterile cafeteria. The Illuminating Engineering Society (IES) recommends warm white light in the 2,700K–3,000K range for relaxation [8].
What finally clicked for me was the concept of “layering.” You want light at different heights: floor lamps for ambient glow, table lamps for task work, and maybe a small accent light to highlight a plant or a bookshelf. When the sun goes down, I turn off the overheads and let the warm, low-level lamps take over. It signals to my brain that the day is done, lowering my cortisol and preparing me for rest.
The Cozy Minimalist Approach
A common misconception is that “cozy” equals “more stuff.” But environmental psychology tells us that clutter actually increases cortisol levels and reduces our ability to feel calm in a space [11]. The goal is “Cozy Minimalism”: choosing a few high-quality, tactile items rather than twenty cheap ones.
- Tactile Comfort: Invest in one heavy, natural-fiber throw (wool or organic cotton) rather than three synthetic fleece ones.
- Acoustic Softening: Rugs and curtains aren’t just for looks; they absorb sound, removing the “echo” that makes a room feel cold and impersonal.
- Intentional Scent: Use a diffuser with high-quality essential oils like cedarwood or lavender rather than synthetic sprays.
The High-ROI Comfort Roadmap: Upgrades for Every Budget
You don’t have to overhaul your entire house this weekend. Comfort is a journey. Here is how I would prioritize your investments based on what will give you the most “lifestyle ROI” per dollar spent.
Tier 1: The “Quick Fix” ($25 – $100)
If you have $100 and a Saturday afternoon, these items will yield the most immediate results.
- Weatherstripping and Caulk: Stop the drafts at the source.
- Warm LED Bulbs: Swap out “daylight” bulbs (5000K) for warm white (2700K) to instantly soften your space.
- Heavy Curtains: These act as a thermal barrier for your windows and help with sound dampening.
- A Digital Hygrometer: To finally know if your humidity is the reason you feel uncomfortable.
Tier 2: The “Game Changer” ($200 – $600)
These are the “Best Goods” that genuinely change how you interact with your home daily.
I used to be the person who constantly fiddled with the thermostat—up two degrees, down one, back up again. It was a mental drain. I finally made the jump to a smart thermostat after reading that they typically pay for themselves in energy savings within about 18 months [6]. What I didn’t expect was the comfort boost. By using remote sensors in my bedroom, the system ensures I’m actually at 68 degrees where I’m sleeping, not just in the hallway where the main unit sits.
Micro-Verdict: The ultimate set-it-and-forget-it tool for both financial savings and perfect thermal consistency.
Tier 3: The “Sanctuary Investment” ($1,000+)
For those ready for a total transformation, these professional-level upgrades solve the root causes.
- Professional Air Sealing: Having a pro find and seal the “hidden” leaks in your attic and crawlspace.
- Upgraded Insulation: Bringing your attic up to modern R-values (R-49 to R-60 depending on your climate).
- Duct Remediation: Ensuring your HVAC system is actually delivering the air to the rooms that need it most.
Creating a comfortable home is one of the kindest things you can do for yourself. It’s the foundation that everything else—your work, your hobbies, your sourdough recipes—is built upon. Start with one “Quick Win” this weekend. Buy that tube of caulk or swap out that harsh lightbulb. You’ll be surprised how quickly those small changes add up to a very good life.
Safety Disclaimer: Always consult with a licensed professional before performing electrical work or handling insulation materials. Ensure space heaters and candles are never left unattended and are kept away from flammable materials. Follow all manufacturer safety guidelines for HVAC equipment and smart home installations.
References
- Sealed (2024). What Makes Houses Drafty? Understanding the Stack Effect.
- Energy Saving Trust (2023). Reducing Home Heat Loss: Roof and Wall Insulation Statistics.
- ASHRAE (2021). Standard 55: Thermal Environmental Conditions for Human Occupancy.
- U.S. Environmental Protection Agency (EPA). Indoor Air Quality: A Guide to IAQ in the Home.
- U.S. Department of Energy (DOE). Energy Saver Guide: Air Sealing and Insulating Your Home.
- Energy Star (2024). Smart Thermostats: Savings and Performance Data.
- Consumer Reports (2023). Best Space Heaters and Safety Guidelines.
- Illuminating Engineering Society (IES). Lighting for Residential Spaces: Recommended Color Temperatures.
- Daikin (2024). The Science of Air: HEPA Filtration vs. Indoor Plants.
- National Fire Protection Association (NFPA). Heating Safety Research and Statistics.
- Environmental Psychology Journal (2022). The Impact of Home Clutter on Cortisol and Subjective Well-being.