I started pricing out “real” landscape lighting—the kind you see in architectural digests. When the quotes for designer fixtures from places like Visual Comfort & Co. started hitting the $2,000 mark for just the front walkway, I knew I had to find a higher “Lifestyle ROI” solution. My philosophy at Best Goods for Good Life is all about choosing better, not just having more. So, I decided on a DIY experiment: I’d replace every traditional bulb and fixture with “cheap” smart LED strips from Amazon.
I expected a fun weekend project. I didn’t expect these five revelations that completely changed how I think about home optimization.
The Problem: Why Traditional Outdoor Lighting is a Budget-Killer
Let’s be real: traditional outdoor lighting is a racket. If you want that “designer look,” you’re often looking at luxury fixtures that cost more than a high-end sofa. Brands like Visual Comfort & Co. and Urban Ambiance offer stunning pieces, but at $300 to $800 per sconce, the math rarely adds up for a standard suburban backyard.
Beyond the cost of the fixtures, there’s the “dull outdoor ambiance” trap. Most traditional setups rely on a single, powerful light source. According to the Illuminating Engineering Society (IES), truly effective lighting design requires “layering”—combining ambient, task, and accent lighting to create depth [7]. A single porch light can’t do that. It just creates harsh shadows and a “flat” environment that feels more like a parking lot than a sanctuary.
The ‘Designer Look’ vs. The DIY Reality
The dream is a softly lit perimeter that makes your yard feel like a boutique hotel. The reality is that hardwiring 120V fixtures requires trenching, conduit, and often a licensed electrician (which can easily run you $150/hour). Low-voltage smart LED strips, however, offer a “High Lifestyle ROI” because they are flexible, relatively safe for DIYers, and can be hidden under railings or rooflines to create that expensive, indirect glow for a fraction of the price.
Surprise 1: They Are Brighter Than Your Old Bulbs
One of my biggest fears was that these strips would look like cheap Christmas decorations—thin, weak, and purely decorative. I was wrong.
What surprised me most was the sheer lumen density. During independent testing, researchers found that even budget-friendly smart LED strips could outshine standard 60W incandescent bulbs when grouped together [1]. Because the light is distributed over 16 to 32 feet rather than a single point, you get a “wash” of light that feels much more substantial.
There’s also the efficiency factor. Data from Energy Star shows that LEDs use at least 75% less energy than incandescent lighting [4]. I found that I could light my entire back deck and fence line for less energy than it took to run my old, yellowing front porch bulb.
Surprise 2: Cheap Strips Have an ‘IP Rating’ Secret
When you’re shopping for “cheap” strips (think the $30–$50 range), you’ll see a lot of talk about being “waterproof.” But here’s the thing: “Waterproof” is a marketing term; “IP Rating” is the science.
Most budget outdoor strips are rated IP65, which means they can handle rain and dust. However, for anything exposed to the elements—like a railing that gets hit by a Texas thunderstorm—you really want IP67, which can handle temporary immersion. I learned the hard way that “cheap” strips often have the IP rating on the strip, but the controller (the little plastic box that connects to Wi-Fi) is barely water-resistant.
As the experts at Birddog Lighting point out, even “waterproof” strips require you to manually seal the connection points with silicone or heat-shrink tape to prevent long-term corrosion [2].
Surprise 3: Connectivity is the Real ‘Budget’ Trade-off
If you’re looking for the “catch” with $30 smart strips, this is it. While the lights themselves are brilliant, the Wi-Fi chips inside them are often… temperamental.
Most of these budget brands rely on 2.4 GHz Wi-Fi. In my experience, if your router is in the center of the house and your LED controller is behind a brick wall on the patio, you’re going to see frequent “Device Offline” messages. CNET’s long-term testing reflected this exact frustration, noting that connectivity drops were the primary “worst” surprise of the DIY smart strip experience [1].
The workaround? I had to be very intentional about where I mounted the controllers, keeping them as close to my mesh Wi-Fi nodes as possible. If you have a large property, you might find that the “cheap” strips require you to buy a Wi-Fi extender, which eats into your savings.
Surprise 4: The ‘Ambiance ROI’ is Massive
I’ll admit it: I was skeptical about the “16 million colors” thing. I thought I’d just use “Warm White” and call it a day. But the first time I set the strips to a soft “Golden Hour” amber for a Saturday night dinner, I was sold.
The psychological impact of color temperature is real. According to research cited by The Spruce, warm light (2200K–3000K) signals to our brains that it’s time to unwind and relax [8]. Being able to dim the lights to 10% and shift them to a candlelight glow transformed my backyard from a utility space into an extension of my living room.
Plus, for the tech-geeks like me, many budget ecosystems like WiZ or Govee allow for “dynamic scenes.” My personal favorite is the “Fireplace” setting, which subtly flickers between oranges and deep reds—it’s incredibly soothing while sipping tea on a cool evening.
Surprise 5: Installation isn’t ‘Hard,’ but it is Detail-Oriented
People often ask me if they need an electrician for this. For most plug-and-play LED strips, the answer is no—but that doesn’t mean you can just “slap them up.” The “surprise” here was how much the surface preparation mattered. I tried sticking a strip directly to my stucco patio wall; it fell down within three hours of the Austin humidity hitting it.
To help you decide if you’re up for this, here is a quick breakdown of what you can do yourself versus what needs a pro:
- DIY Friendly: Cleaning surfaces with isopropyl alcohol, mounting strips with screw-in clips, plugging into existing GFCI outdoor outlets, and setting up the app.
- DIY Friendly: Applying silicone sealant to end caps and using heat-shrink tape for connections.
- Pro Required: Installing new outdoor GFCI outlets if you don’t have one nearby.
- Pro Required: Hardwiring a transformer directly into your home’s electrical panel for high-voltage, long-run systems.
As eufy’s installation guide suggests, the secret to a strip that stays up for years is all in the surface prep and the use of physical mounting clips every 12 inches [11].
The Jordan Miller Setup: Gear Recommendations
I’ve spent months testing which brands actually survive the heat and rain. Here are the three that I believe offer the best Lifestyle ROI based on different needs.
The Budget Pick (~$30): Govee Outdoor RGBIC Strips
Let let me be honest: I ignored Govee for years because I thought they were just for “gamers.” I was wrong. When I finally tried their outdoor-rated strips, I realized they’ve nailed the “price-to-vibe” ratio. These strips use RGBIC technology, meaning you can have multiple colors on one strip at the same time—perfect for creating a subtle sunset gradient along your fence.
Micro-Verdict: The ultimate choice for anyone who wants a high-end, multi-color look without spending more than a bag of groceries.
The Reliable Mid-Range: TP-Link Kasa Smart Outdoor Strip
You know that feeling when you just want technology to work? That’s Kasa. I found myself getting frustrated with other budget apps that felt clunky or required constant re-pairing. Kasa’s app is clean, the integration with Alexa and Google Home is rock-solid, and the Wi-Fi stability is notably better than the generic “no-name” brands I found on Amazon. It’s slightly more expensive, but the reduced “tech-headache” makes it worth it.
Micro-Verdict: Best for homeowners who prioritize a stable app experience and easy smart-home automation.
The Ecosystem King: Philips Hue Outdoor Lightstrip
I’ll admit it—I was skeptical at first about the price tag on these. They are significantly more expensive than Govee or Kasa. However, after using them, the difference is in the “diffusion.” Most cheap strips look like a string of bright dots. The Philips Hue strip is encased in a thick, milky silicone that turns those dots into a single, seamless neon-like glow. It uses Zigbee instead of Wi-Fi, which means it doesn’t bog down your home internet.
Micro-Verdict: The “splurge” pick for minimalists who want a professional, seamless architectural look.

How to Install Outdoor LED Strips (The Right Way)
If you’re ready to tackle this over the weekend, don’t skip these steps. I learned them through trial, error, and a few “why isn’t this working?” moments.
Step 1: The ‘Dry Run’ Test
Before you climb a ladder or peel off any adhesive, plug everything in on your living room floor. Pair it with the app and test every color. There is nothing more frustrating than mounting 32 feet of LEDs only to realize the last 3 feet have a dead green diode.
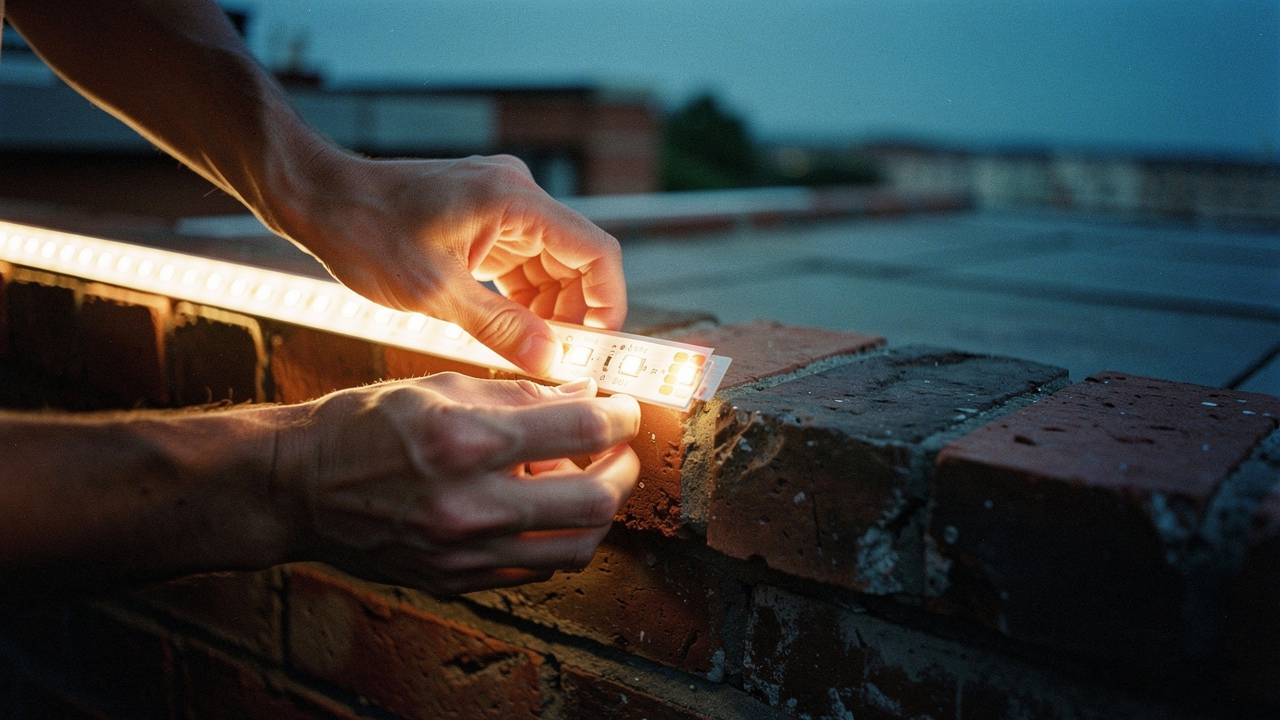
Step 2: Surface Prep & Mounting
Outdoor surfaces are gross. Dust, pollen, and humidity are the enemies of adhesive.
- Wipe the mounting surface with a 70% isopropyl alcohol solution.
- If you’re mounting to wood or brick, the “peel and stick” backing will eventually fail. I highly recommend using mounting clips with small stainless steel screws every 12 inches [2].
- For concrete or stucco, look into outdoor-rated mounting tracks (aluminum channels) which provide a flat surface for the strip to grip.
Step 3: Sealing for the Texas Heat/Rain
Even if your strip is IP65 rated, the “pigtail” (where the strip meets the power cord) is a major failure point. Use a small amount of clear outdoor silicone sealant around the end caps. For the electrical connection to the controller, I use heat-shrink weatherproofing tape to ensure no moisture can creep into the pins. Finally, always ensure your outdoor outlet has a “bubble cover” and that you create a drip loop (a U-shaped dip in the cord) so rainwater drips off the wire before it reaches the outlet [10].
Summary: Is the Switch Worth It?
Replacing my traditional outdoor lighting with smart LED strips wasn’t just about saving money—though spending $60 instead of $600 was a nice perk. It was about taking control of my environment. Now, my outdoor space supports my life: bright white for Sunday morning gardening, soft amber for evening journals, and festive colors for Austin backyard BBQs.
For under $100 and a few hours of detail-oriented work, you can achieve a lighting setup that looks professionally designed and works harder for your daily routine. Start small—maybe just a single rail on your deck—and I promise, you’ll never look at a standard porch light the same way again.
Ready to glow? Tag me in your #OutdoorLighting overhaul photos or sign up for my newsletter for more high-ROI home hacks.
***
References & Authoritative Sources
Disclaimer: This post contains affiliate links. Electrical work carries inherent risks, including fire and shock. While low-voltage LED strips are generally DIY-friendly, always ensure you are plugging into a GFCI-protected outlet. For any permanent line-voltage wiring (120V) or installation of new outlets, please consult a licensed electrician to ensure compliance with local building codes.
- CNET (2023). I Replaced All My Outdoor Lighting with Cheap Smart LED Strips — Here Are 5 Surprises. Source
- Birddog Lighting (2024). How to Choose and Install Outdoor LED Strip Lights. Source
- UL Solutions (2024). Understanding IP Ratings for Electrical Equipment. Source
- Energy Star / U.S. Dept of Energy (2023). LED Lighting Efficiency Benchmarks. Source
- Energizer Connect (2024). Smart 50ft RGBIC Outdoor Strip Specifications. Source
- TP-Link Kasa (2024). Kasa Smart LED Light Strip KL430 User Guide. Source
- Illuminating Engineering Society (IES). Lighting Design Fundamentals: Layering Light. Source
- The Spruce (2024). Outdoor Lighting Designs and Color Temperature Guide. Source
- WiZ Connected (2024). Product Ecosystem and Dynamic Scenes Documentation. Source
- NFPA (2023). National Electrical Code (NEC) Section 406.9: Receptacles in Damp or Wet Locations. Source
- eufy (2024). How to Install LED Strip Lights: Surface Preparation and Safety. Source